

The Complete Guide to Growing Lion’s Mane Mushrooms at Home (Using a Grow Kit or Spores)
.png)
In recent years, mushrooms have significantly increased in popularity. These compounds are in the spotlight due to the robust array of health benefits and medicinal properties they potentially offer.
While there is a wide spectrum of mushroom varieties (each with its own harmonious blend of nutritional potency and value), we will be focusing on the almighty Lion’s Mane Mushroom (Hericium erinaceus).
.png)
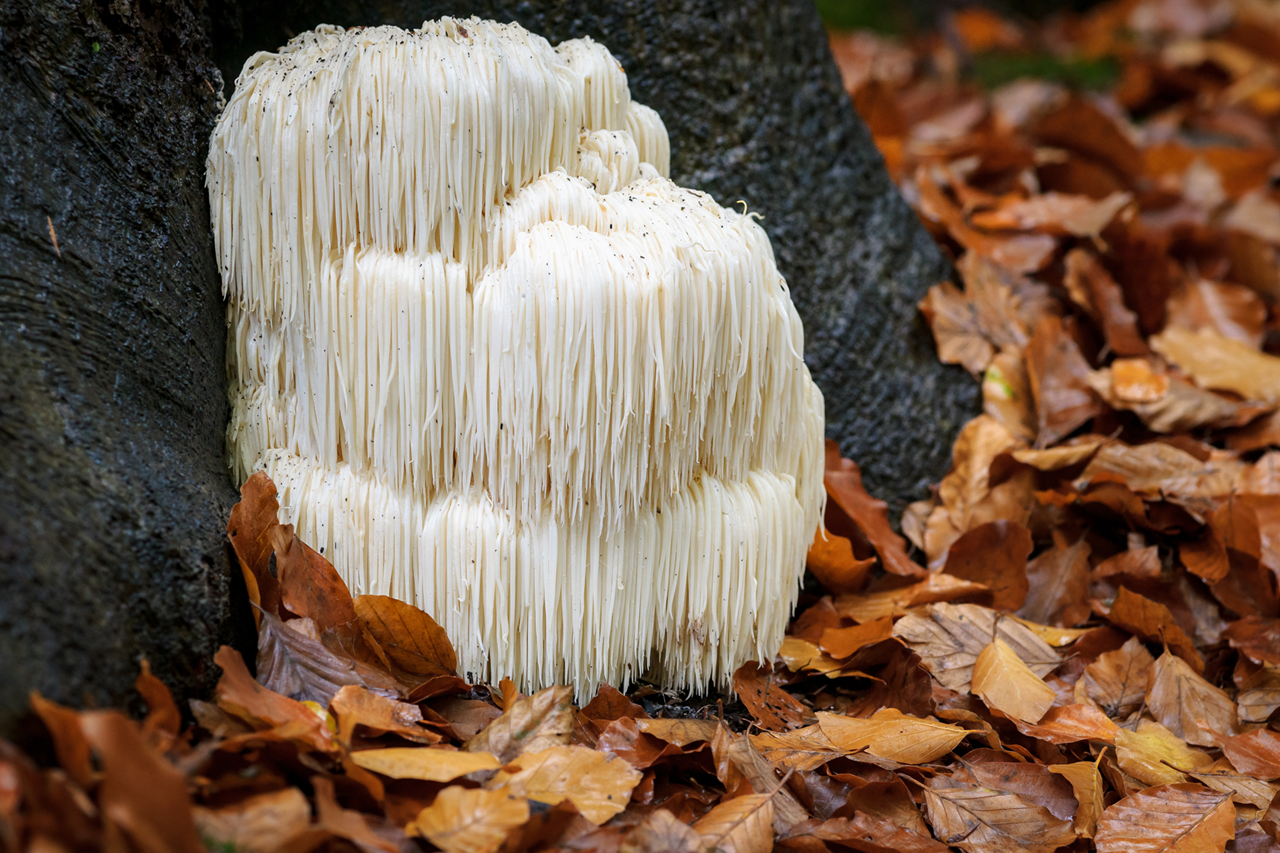
This fascinating fungus is renowned for resembling a lion's regal mane.
While it quickly catches the eye, its allure goes well beyond its good looks, as Lion’s Mane has been shown to support human health in many positive ways. Today, we will be discussing how to tap into the benefits of Lions Mane by cultivating it at home.
Cultivating these fungal delights is well worth it. Not only for the pleasure and gratification of cultivating them with your own nurturing hands but also for the cost-effective benefits that come hand-in-hand with growing them yourself, in the comfort of your own dwelling!
Each stage of this delicate but doable process reflects a far-reaching appreciation for the art of mushroom cultivation. Growing mushrooms at home allows you to witness the beauty of nature while doing so at your own pace.
Potential Health Benefits of Lions Mane
Without getting too deep into it, here’s a list of perceived health benefits from this mushroom species:
.png)
Regenerative nerve growth in the brain
Reduces inflammation
Boosts immune system
Improves heart health
Protects against cancer
Alleviates symptoms of anxiety and depression
Improves focus and mental clarity
Delicious to eat
Relatively easy to grow
Things to Know: Growing Lions Mane at Home
Compared to other mushroom varieties, Lions Mane is considered to be relatively unfussy to grow as it grows similarly to other gourmet mushroom varieties.
They also grow quickly which helps to fast track your mushroom growing journey – which is good for sustaining motivation and enthusiasm while inspiring you to try your hand at growing other mushroom varieties!
Nothing better than seeing the fruits of your labor sooner than later.
There are two main ways to grow your own mushrooms at home.
The first (and easiest) is to purchase a fully colonized ready-to-fruit bag ( i.e. a Lions Mane grow kit or a substrate block that has mycelium in there already).
The second (and more complicated option) is to colonize your own substrate from beginning to end. This process is unpacked below.
.png)
Step 1: Gathering The Tools & Equipment
Before starting this process, it’s important to ensure that you have everything you need beforehand.
Lion's Mane mushroom spawn (mycelium): seek out the finest spawn from trusted sources
Growing substrate: Lion's Mane thrives on hardwood substrates like sawdust or wood chips supplemented with about 20% bran
You can even use a Master’s Mix which is about 50% soybean hulls and 50% hardwood sawdust
Vessels: plastic bags or containers with lids that will house the mushroom growth
Hydration: functional spray bottle to mist/hydrate your mushrooms
Sterilization tools: pressure cooker or boiling water to ensure the safety of the growth space
Optional but recommended: humidifier or humidity tent to create a lush atmosphere for the Lion's Mane to thrive in (particularly important for dry climate areas)
Step 2: The Preparation of the Substrate
Lion's Mane typically grows on hardwood substrates. If you are using sawdust or wood chips, sterilize them in a boiler or pressure cooker to kill off competing organisms before use.
If using a mushroom growing kit, follow the instructions provided with the kit.
Step 3. Inoculate the Substrate
Once the substrate is sterilized (sterilize for about 2.5 hours) and cooled, mix it with the Lion's Mane mushroom spawn, which is a substrate that is already colonized by the mushroom mycelium. This process is called inoculation.
Mix the spawn and substrate thoroughly to evenly distribute the mycelium.
Typically there is a 2-3% spawn-to-substrate ratio.
Step 4. Incubation
Place the inoculated substrate into plastic bags or containers and seal well. Cut slits in the bag (one slit across the center for smaller bags, and two diagonal slits from the top for bigger bags).
These slits will be important as they are where the Lion's Mane will fruit through.
Place the containers in a warm and humid environment. Ideal temperature ranges are typically between 15-24°C depending on the strain of the mushroom.
The mycelium will start growing and colonizing the substrate. This stage is called incubation.
Step 5. Fruiting
Once the substrate is fully colonized by the mycelium, it's time for the fruiting process.
Lion's Mane mushrooms grow in clusters but are typically thinner than other varieties such as Oyster mushrooms.
It's important to have a humid environment for the fruiting. This can be achieved by using the recommended humidity tent or a humidifier (as mentioned above in the gather-the-equipment section) or by simply being sure to consistently mist/hydrate the blocks to mimic natural environmental/forest conditions. Ideal humidity levels: 85-90%
Provide indirect light, as direct sunlight can dry out the growing environment
Ideal light conditions: 500-1000 Lux
Access to plenty of fresh air is important for the correct amount of C02 levels to support the mushroom growth.
Lion's Mane mushrooms will start forming "pins,". It will take about 3-7 days for the first pins to be noticeable at the location of the slits you cut on the bag. After about 5-10 days these will become more noticeable and create more substance.
These are small mushroom primordia.
As they continue to grow, they will develop into recognizable clusters, eventually looking like the Lion's Mane mushroom your recognize.
Step 6. Harvesting
To harvest the mushrooms, feel the head of the Lion’s Mane first. If it has some give, it is ready to twist and pull off. If it still feels firmly in place and doesn’t have much give, then your Lion’s Mane needs to grow for longer.
In order to pick the Lion’s Mane, start by gently twisting (or cutting) them from the substrate bag when they reach the desired size and maturity. Leave some behind to allow for future flushes.
If you leave them too long – the long tendrils of the Lion's Mane will droop down and the fruiting body of the mushroom will be smaller than if it were picked at its peak.
A decent substrate block will give you about 2-3 crops of Lion’s Mane per block.
Step 7. How to Get Your Next Crop Going
Turn your bag over and create 1-2 slits in a new area. Now rest your block in the ideal conditions and in 1-2 weeks new pins will start emerging, and then you are back into the next cycle.
.png)
Fruiting Tips: If you notice a pink tinge to your fruiting mushroom bodies this can be due to non-ideal temperature conditions. If you notice yellow/brown colors on your fruiting mushroom bodies this can be due to the environment being too dry or too windy (as in the case of being near a fan – creating windburn).
Growing Lion's Mane mushrooms at home requires attention to detail and proper hygiene to prevent contamination.
Keep in mind that growing mushrooms can be a bit complex, so be sure to exercise patience and pay careful attention to every step of the process to increase your chances of successful growth.

.png)
.png)


